Geometry in Year 2 (age 6–7)
In Year 2, your child will learn to describe 2D and 3D shapes using accurate mathematical vocabulary. They will also learn to find 2D shapes in 3D shapes, to arrange shapes into patterns, and to talk about rotation.
The key words for this section are 2D, 3D, polygon, line of symmetry, non-polygon, and vertex.
What your child will learn
Take a look at the National Curriculum expectations for geometry in Year 2 (ages 6–7):
Describe the properties of 2D shapes
Your child will also be able to recognise and talk about vertical lines of symmetry in 2D shapes.
Describe the properties of 3D shapes
Identify 2D shapes on the surface of 3D shapes
Compare and sort common 2D and 3D shapes
They will be able to sort 2D and 3D shapes in a variety of ways. For example, they could order a group of everyday objects by how many faces they have, or split the objects into ‘shapes with curved edges’ and ‘shapes with no curved edges’.
Arrange shapes in predictable patterns
For example:
Your child might be asked to find the next two shapes in this sequence.

Describe position, direction, and movement
Your child will learn to understand a ‘rotation’ as a turn, such as full or half turns, and they will connect movement in clockwise and anti-clockwise movements to movements on a clock face. They will also begin to understand turns as a measurement of angle (for example, right angles in quarter turns).
How to help at home
There are lots of everyday ways you can help your child to understand geometry. Here are just a few ideas.
1. Explore shapes around us
Find everyday opportunities to talk to your child about common 2D shapes like rectangles, triangles, and pentagons. Try to use the language of polygons and non-polygons:
-
- A polygon is a 2D shape that has three or more straight sides and angles (for example, a rectangle).
- A non-polygon is a 2D shape with sides that are not all straight (for example, a semicircle).
When talking about 2D shapes, encourage your child to use language like straight, curved, side, and corner (or vertex/vertices) to describe them. This will help them to understand the properties of 2D shapes and to know how they differ from 3D shapes.
Your child should know that 2D shapes are completely flat shapes. See how many different 2D shapes your child can spot in everyday life, such as on buildings, cushions, clothes, curtains, or in picture books!
2. Talk about 3D shapes
Talk to your child about common 3D shapes such as cuboids and prisms (a prism is a 3D shape that has two identical parallel bases, such as a cylinder).
Point out 3D shapes in different orientations and sizes when out and about with your child. See if they can describe the shapes to you using precise language like face, vertex (vertices), and edge.
Seeing lots of real-world examples will help your child realise that shapes like cuboids and pyramids are not always similar to each other. For instance, they could identify pyramids with different bases, such as triangular or square-based pyramids.
3. Guess the shape
Try this game with your child:
Alternatively, you could draw a shape without your child seeing. Describe the shape to your child and see if your child can draw it from your description. Compare the shapes to see how close they are.
Remember that it is important for children to see shapes in different orientations. For example:

You could also try challenging your child to find certain shapes – a 3D shape with a square base, a 2D shape that has three sides, and so on. This helps them understand exactly what all these maths words mean.
4. Compare, order, and sort shapes
Your child needs to be able to compare shapes using the correct mathematical language.
Show your child two shapes, 2D or 3D (for example, building blocks, cereal boxes, cans). Can your child name the shapes? Ask them to describe to you what is the same about them and what is different. For example:
You may choose a cube and a cuboid. Your child may tell you the shapes are similar in that they are both 3D shapes with 8 vertices, 12 edges and 6 faces. They are different in that a cube has 6 square faces whereas the cuboid may have 6 rectangular faces (which could be a mixture of squares and rectangles).
To practise sorting 2D shapes, your child could put the shapes into groups according to the number of sides, whether they are regular or irregular, and so on. When working with 3D shapes, they could sort the shapes according to the number of edges, vertices, faces, whether they can roll or not, and so on.
You could ask your child to sort their shapes in any way they like and decide on the headings for the groups. This helps them to figure out properties of shapes independently.
Video: How to describe 2D and 3D shapes
5. Play position and direction games
Use the language of position, direction, and motion, including:
Left, right, top, middle, bottom, on top of, in front of, above, between, around, near, close, far, up, down, forwards, backwards, inside, outside, north and south.
You could also play a game outside where your child is blindfolded and you have to direct them towards a given location. Use commands like ‘Turn left and walk three steps forward, then make a half turn clockwise’.
Help your child to understand whole, half, quarter, and three-quarter turns both clockwise and anti-clockwise. It may be useful to connect clockwise and anti-clockwise with the movement on a clock face. This will help them in their understanding of angle, which is a measurement of how much something turns.
6. Explore symmetry
At school, your child will be learning to describe vertical lines of symmetry in 2D shapes. You can help your child practise with this activity:
-
- Ask your child to cut out a selection of 2D shapes.
- Encourage them to fold the shape in half vertically to determine if the shape has a line of symmetry.
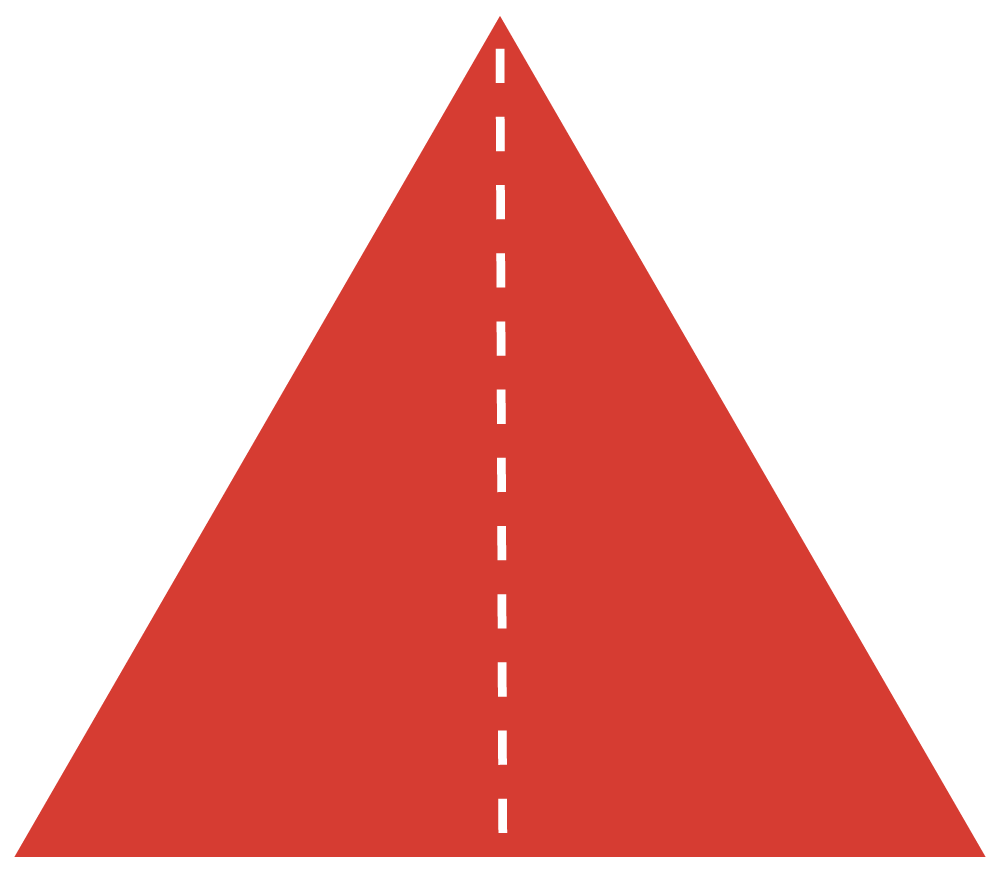
- They can then draw a dotted line to show each line of symmetry. For example, if your child has folded an isosceles triangle in half in various ways, they will find that it has one line of symmetry.
Mirrors are also a great way to explore symmetry. Draw half a shape and see if your child can tell you the name of the full shape. Then, put a mirror along the centre line to see the complete shape. Were they right?
For a challenge, encourage your child to begin exploring lines of symmetry in horizontal and even diagonal lines.