Geometry in Year 4 (age 8–9)
In Year 4, your child will learn about acute and obtuse angles. They will also be introduced to coordinates and will be able to describe translations, and will build upon their knowledge of shape properties.
The key words for this section are 2D, 3D, axis, coordinate, line of symmetry, symmetrical, and translate.
What your child will learn
Take a look at the National Curriculum expectations for geometry in Year 4 (ages 8–9):
Compare and classify geometric shapes
Your child will learn to classify 2D shapes and 3D by comparing, sorting, ordering, and describing shapes based on their sizes and properties.
Identify acute and obtuse angles
Your child will be expected to identify right angles as well as acute and obtuse angles. A right angle is 90°, an acute angle is less than 90°, and an obtuse angle is between 90° and 180°. They will also need to order angles by size.
Find lines of symmetry in 2D shapes
Your child will be able to identify vertical, horizontal, and diagonal lines of symmetry in 2D shapes.
Draw a mirror image of a shape
Your child will be able to accurately draw mirror images of shapes in lines of symmetry.
Describe coordinates on a 2D grid
They should be able to describe the position of a 2D shape in the first quadrant of a grid by reading the coordinates of each of the corners/vertices of the shape.
Describe movements between positions as 'translations'
Your child will be able to describe how a shape has moved on a grid.
They should describe the movement using the language left, right, up, and down. For example, ‘The square has been translated two spaces to the right and three spaces down’.
Plot specified points and draw sides to draw polygons
Your child will be expected to plot specific points on a grid to draw a polygon. For example, they may be asked to draw a rectangle using these coordinates: (2,1) / (5,1) / (2,3) / (5,3). They will then be expected to connect the points using straight lines to create the rectangle.
Remember, you can work out coordinates by going right along the grid by the value of the first number, and up the grid by the value of the second number. So, for (2,1), you would find the point by going right along the grid by 2, and up the grid by 1.
How to help at home
There are lots of everyday ways you can help your child to understand geometry. Here are just a few ideas.
1. Explore properties of shapes
You can support your child’s learning by helping them to describe shapes in terms of properties, such as:
-
- The number of sides/edges
- The number of faces
- The number of vertices/corners
- Types of angles within shapes
- Lines of symmetry (if any).
Encourage them to use specific mathematical language such as diagonal, vertical, horizontal, and parallel too.
Ask your child to draw different types of 2D shapes such as triangles (for example, isosceles, equilateral, and scalene) and quadrilaterals (for example, parallelogram, rhombus, and trapezium). To up the challenge, why not specify dimensions such as length of the sides or size of the angles? Choose a number between 3 and 10 and ask your child to draw as many polygons as they can with a particular number of sides.
Ask your child to describe the polygons they have drawn. What is the same about the shapes? What is different? What are the names of the shapes you have drawn? Is this shape regular or irregular? What do you know about the angles in your shapes?
2. Compare, order, and sort shapes
Show your child two shapes, 2D or 3D. Can they name the shapes you have chosen? Are they able to tell you whether the shape is regular or irregular? Ask your child to describe what is the same and what is different about the two shapes (in regard to the number of sides/edges, number of lines of symmetry, types of angle, and so on).
Encourage your child to compare, order, and sort a range of geometric shapes based on their properties and size. Ask your child to sort the shapes in any way they would like, explaining how they have ordered or sorted them. You child could record how they have sorted the shapes using a chart.
3. Find angles in art
It is important that your child understands angle as a measurement of turn and knows that we measure angles in degrees (°). They will know that right angles measure 90° and will be introduced to the terms acute and obtuse.
Encourage your child to name these angles in shapes, in drawings, and in real life. Artists such as Kandinsky created artwork that provides many opportunities to recognise geometric shapes and practise identifying and measuring angles. Why not look them up online – for example, try Balancement Art by Kandinsky.
Why not see if your child can create their own Kandinsky-inspired piece of artwork? You can then discuss the geometric features within the shapes that your child has chosen to use. Can you order the size of the angles in their artwork from smallest to largest.
Video: What is an angle?
4. Explore symmetry
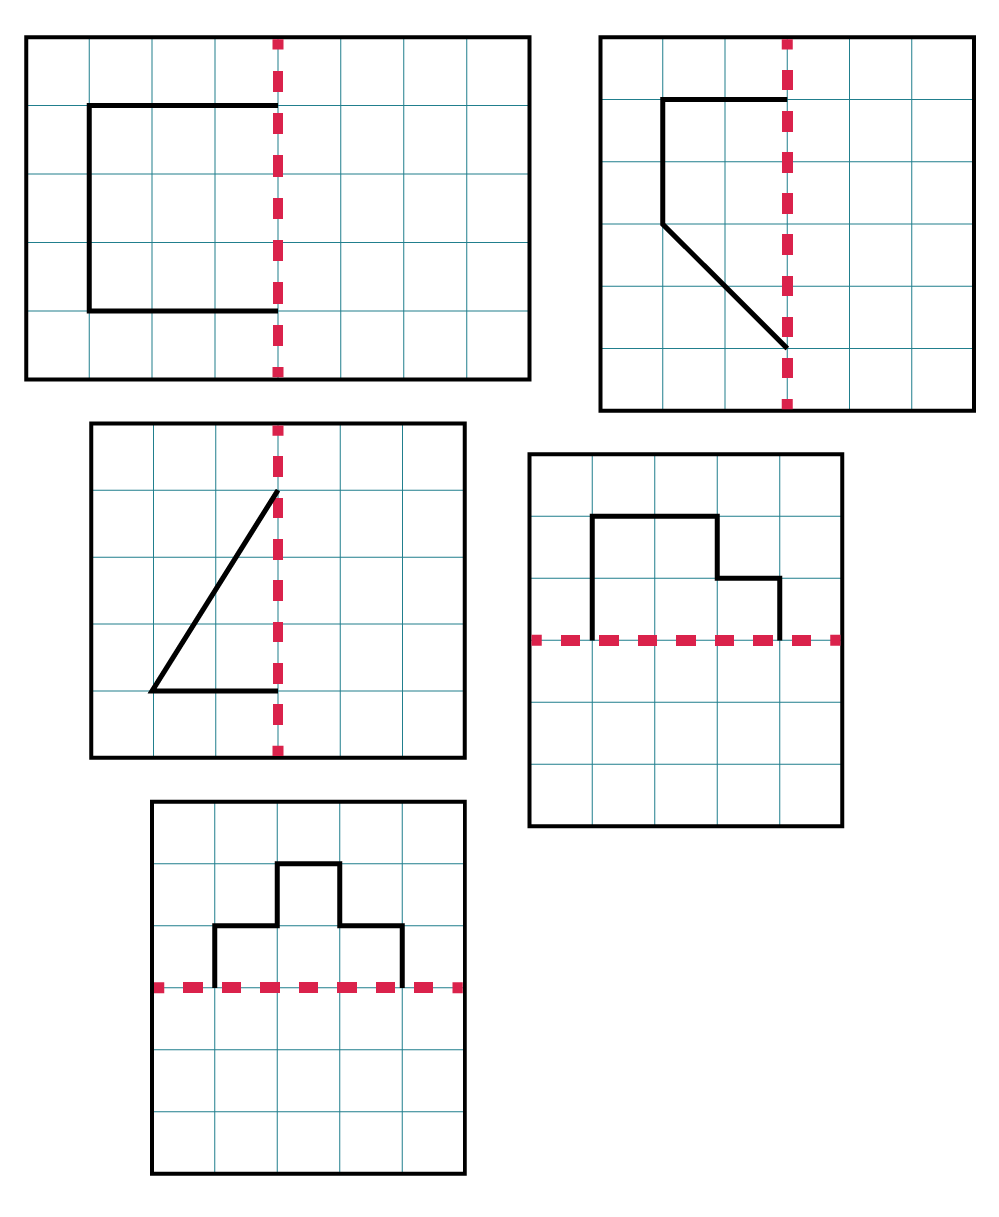
You child will be learning to identify multiple vertical, horizontal, and diagonal lines of symmetry in 2D shapes.
Patterns in art and nature provide great opportunities to explore lines of symmetry. Encourage your child to draw symmetric patterns using pens, paint, and collage, or ask them to cut out a selection of regular 2D shapes and think about how many lines of symmetry they can see. Can they fold the shape in half vertically, horizontally, and diagonally? How many perfect folds can they make?
Your child could try drawing mirror images of simple shapes in lines of symmetry. Alternatively, you could draw half a shape on squared paper and ask your child to complete the shape using their shape facts.
5. Have a treasure hunt
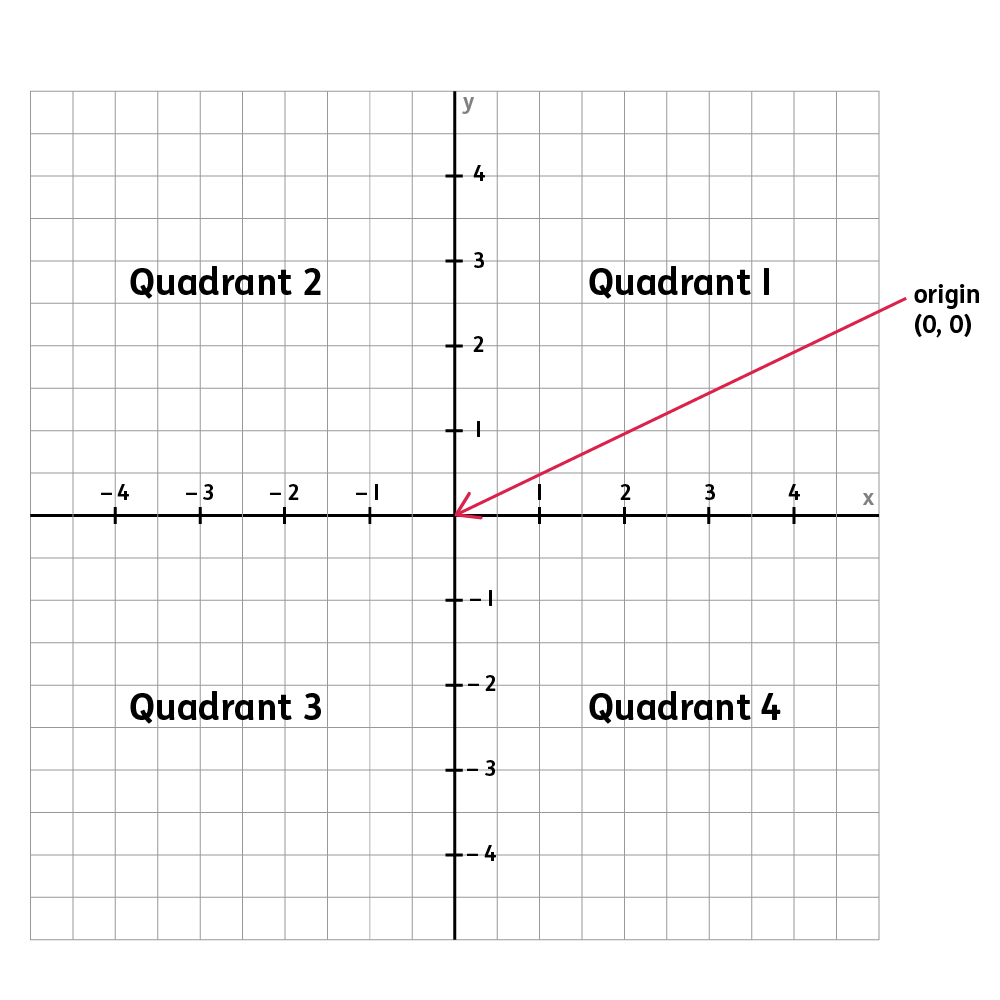
Coordinates are numbers that determine the position of a point on a map, grid, or graph. Coordinates are recorded like this: (1,2). The first number in a coordinate tells us where the point is on the x-axis (the horizontal axis). The second number tells us where the point is on the y-axis (the vertical axis).
You can help your child learn about them by plotting coordinates in this form (a,b). They will have to first find or plot the value on the x-axis (a) by going left or right, and then the value on the y-axis (b) by going up or down. In the example below, the coordinate for the plotted point would be (5,6), where 5 is the value on the x-axis and 6 is the value on the y-axis:

Why not use maps to practise using coordinates? For instance, you could go on a treasure hunt! Have your child draw you a map of the house or the garden, complete with a coordinate grid. Then, you could both hide objects around the house, and give each other the coordinates to find each other’s hidden treasures.
Activity: Treasure hunt
Play with a friend to learn about coordinates.
6. Try the grid challenge
Your child will need to plot points on a grid to draw a polygon. Using the coordinates of each corner of a shape, they will be able to plot the points and join them up. Ask your child to name the shape they have made and explain how they know.
For example, you could give your child a blank grid and these coordinates: (2,1) / (6,1) / (2,5) / (6,5). After plotting and joining the points, your child will see that they have created a square (which they will know because it has four right angles and four equal sides):
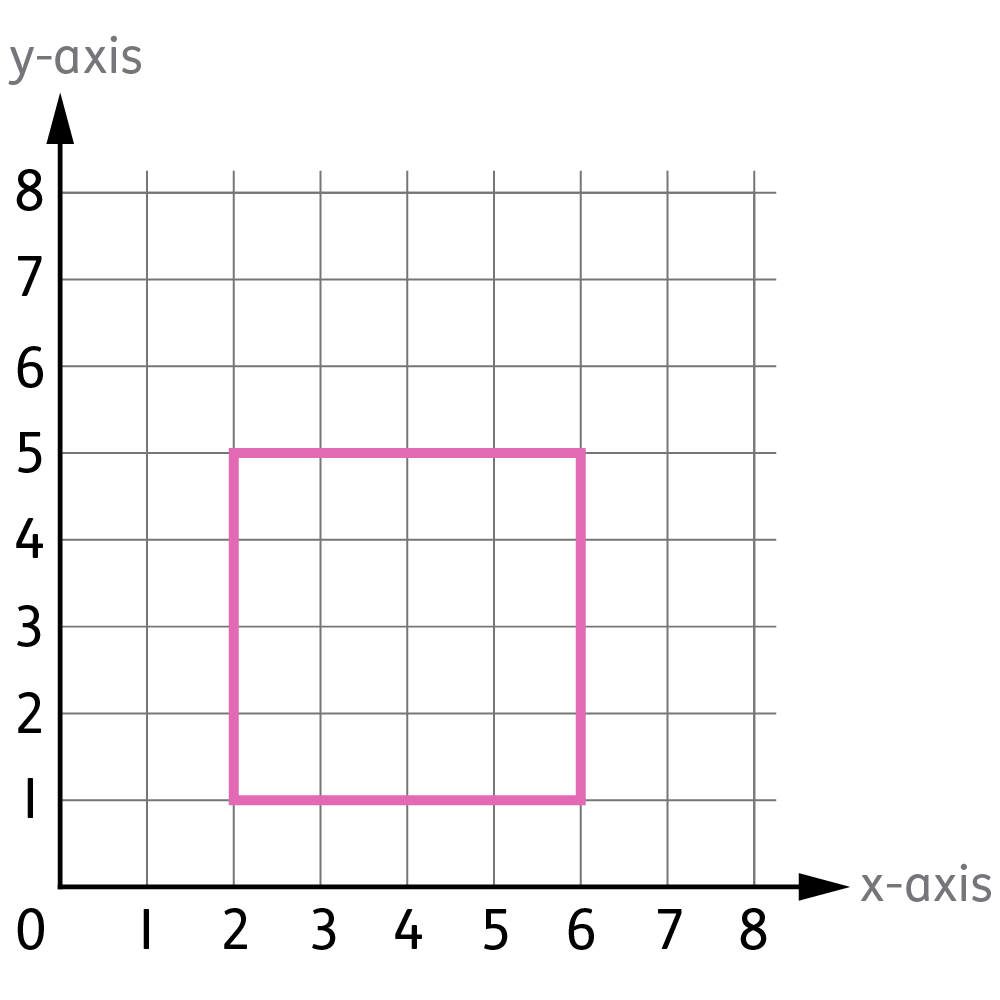
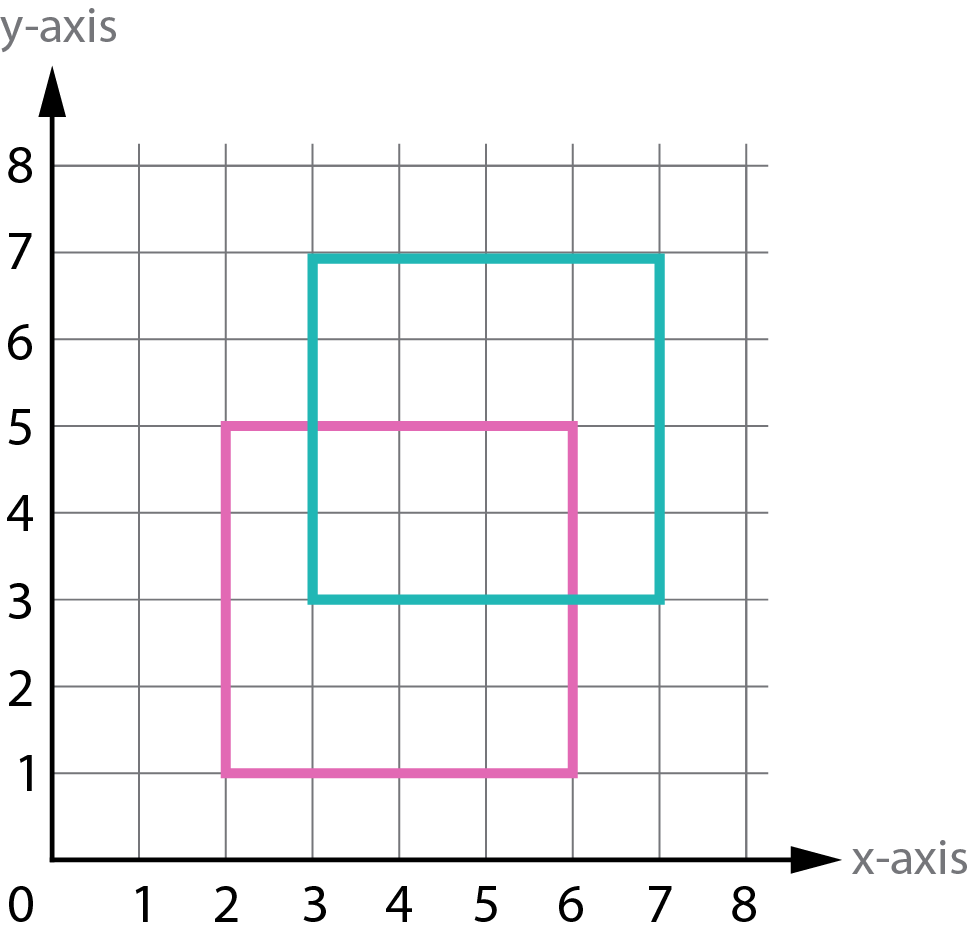
It would also be helpful for your child to get some experience translating simple shapes using coordinate grids. Translating means to move a shape in any direction without rotating it or changing its size.
It is important they are able to describe how the shape has moved using language such as left, right, up, and down. After drawing the shape using the coordinates in the previous activity, you could ask your child to translate the shape. For example, you could ask your child to move the square two up and one to the right. In this example, the coordinates of the new, translated square would be (3,3) / (7,3) / (3,7) / (7,7):